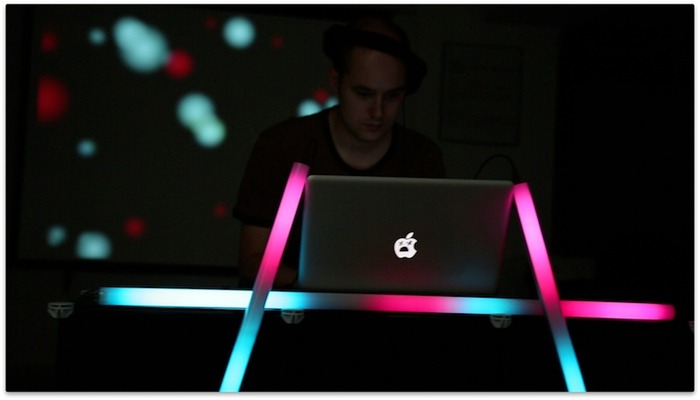
DiscoParty

Uses
- Light up your DJ booth.
- Add mood lighting to your next party.
- Create installations that react to music, voice, or other sounds.
- And more!
Features
- Uses your computer’s audio input.
- Written in Processing, so customization is easy!
Downloading DiscoParty
Prerequisites
To use DiscoParty, you’ll need to download and install:
- Processing – Use the latest stable version.
DiscoParty comes in the examples folder of the BlinkyTape source repository on Github.
If you have Git installed, you can grab the BlinkyTape repository with:
$ git clone https://github.com/Blinkinlabs/BlinkyTape_Processing.git
If you don’t have Git installed, you can download the BlinkyTape respository as a zip file.
Using DiscoParty
- Connect your BlinkyTape to your computer via USB.
- Open the DiscoParty sketch in Processing
Find it at BlinkyTape/examples/DiscoParty/DiscoParty.pde. - Click the Run button.
Out of the box, DiscoParty uses your computer’s built-in sound input (ie – microphone input) for it’s sound source. This is a great way to get started quickly, but means that your lights will react to all ambient sound in the room, not just your music.
Send your computer’s Audio Input into DiscoParty with SoundFlower (OS X Only)
For users of Mac OS X, SoundFlower is a great way to send your computer’s audio output right into DiscoParty without using the microphone.
Windows users shouldn’t have to worry about this part.
To use DiscoParty with SoundFlower:
- Install Soundflower (requires reboot!)
- Run Soundflowerbed – this is a small app that keeps a configuration widget in the top-right part of your Mac’s menu bar.
- Configure system audio to pipe through Soundflower:
- Option-click on the Volume control in the OS X taskbar
- Change Output Device to Soundflower (2ch)
- Repeat 1 and 2 to set Input Device to Soundflower (2ch)
- Run DiscoParty in Processing.
Advanced Usage
For folks who are comfortable making things in Processing, here’s a little more in-depth technical information about how the DiscoParty works with BlinkyTapes.
You can use this information to customize the colors that are displayed, the sound frequencies that your lights respond to, any more!
How DiscoParty Detects Interesting Sounds
DiscoParty uses some cool beat-detection code from the minim class: have a look at some documentation.This is a nice toolbox of stuff like beat detectors. DiscoParty draws some cool stuff based on these, then uses our BlinkyTape code to render those onto the LED strip. You could use this to make your own special DiscoParty with different colors, or a different kind of response to the music…right now it’s tuned to react most strongly to kick drums.
How DiscoParty Displays Lights on a BlinkyTape
For more on using the BlinkyTape software, see the BlinkyTape Processing Page.