Light painting with Blinkytape
BlinkyTape is a great tool for doing light painting – that is, using bright, moving lights to create an image on a camera that you can’t see with the naked eye. It’s kind of like magic, except easier.
In fact, PatternPaint is set up to make this really simple. Let’s do this.
Here are some instructions, in the form of an animated gif:

It really is, but let’s break this down a little further to make sure we didn’t miss anything in the gif.
Step 1: Gather the materials
Here’s what you need:
- BlinkyTape
- Computer with PatternPaint
- USB battery pack (a laptop will work in a pinch!)
- Your favorite image
- Camera with manual controls
- Tripod (or a friend with a steady hand)
- Darkness
- An assistant (or a timer on your camera)
Step 2: Load the image on your BlinkyTape
This part is pretty easy – we’re just going to use PatternPaint to save an image onto the tape.
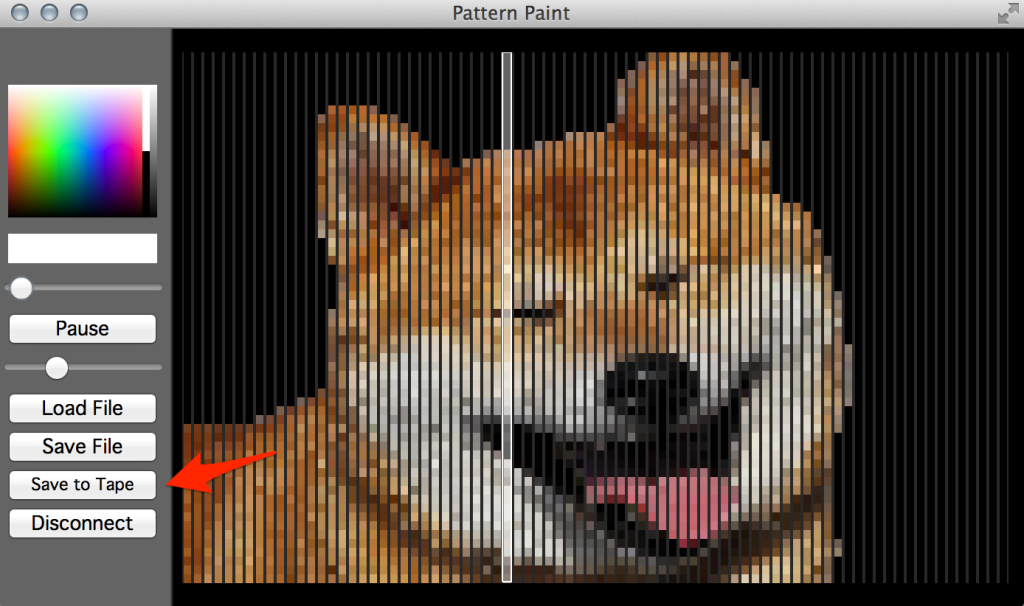
Fire up Pattenpaint, then connect your BlinkyTape and load in the image you want.
You can use the “Load File” option to load in most images (jpg, png, etc.) Note: PatternPaint will resize them automatically to 60 pixels tall. Drag the corner of the window to resize if you don’t see all of your image at first. You can also use the drawing tools to edit the image right in PatternPaint!
When everything is ready, just hit “Save to Tape” and the image should be loaded onto your Blinkytape next time it’s connected to a power source.
Note: if you’re running custom firmware on your BlinkyTape, you may need to restore the factory image. Try “Restore Rainbow Sketch” in PatternPaint tools.
#Step 3: Prepare the Blinkytape for light painting Light painting is best done with a portable USB power source. Once you’ve loaded your image onto the tape, it will play back whenever it’s connected – i.e. whenever you turn the battery on or plug the tape into phone charger.
So, this will depend a bit, but it might be as simple as plugging your BlinkyTape into your battery with a USB cable.
If you don’t have a USB Battery, you can use the battery in your laptop (turn off the screen so it doesn’t show up in the picture, and be careful!) A phone charger and an extension cord might also work.
Step 4: Prepare your camera
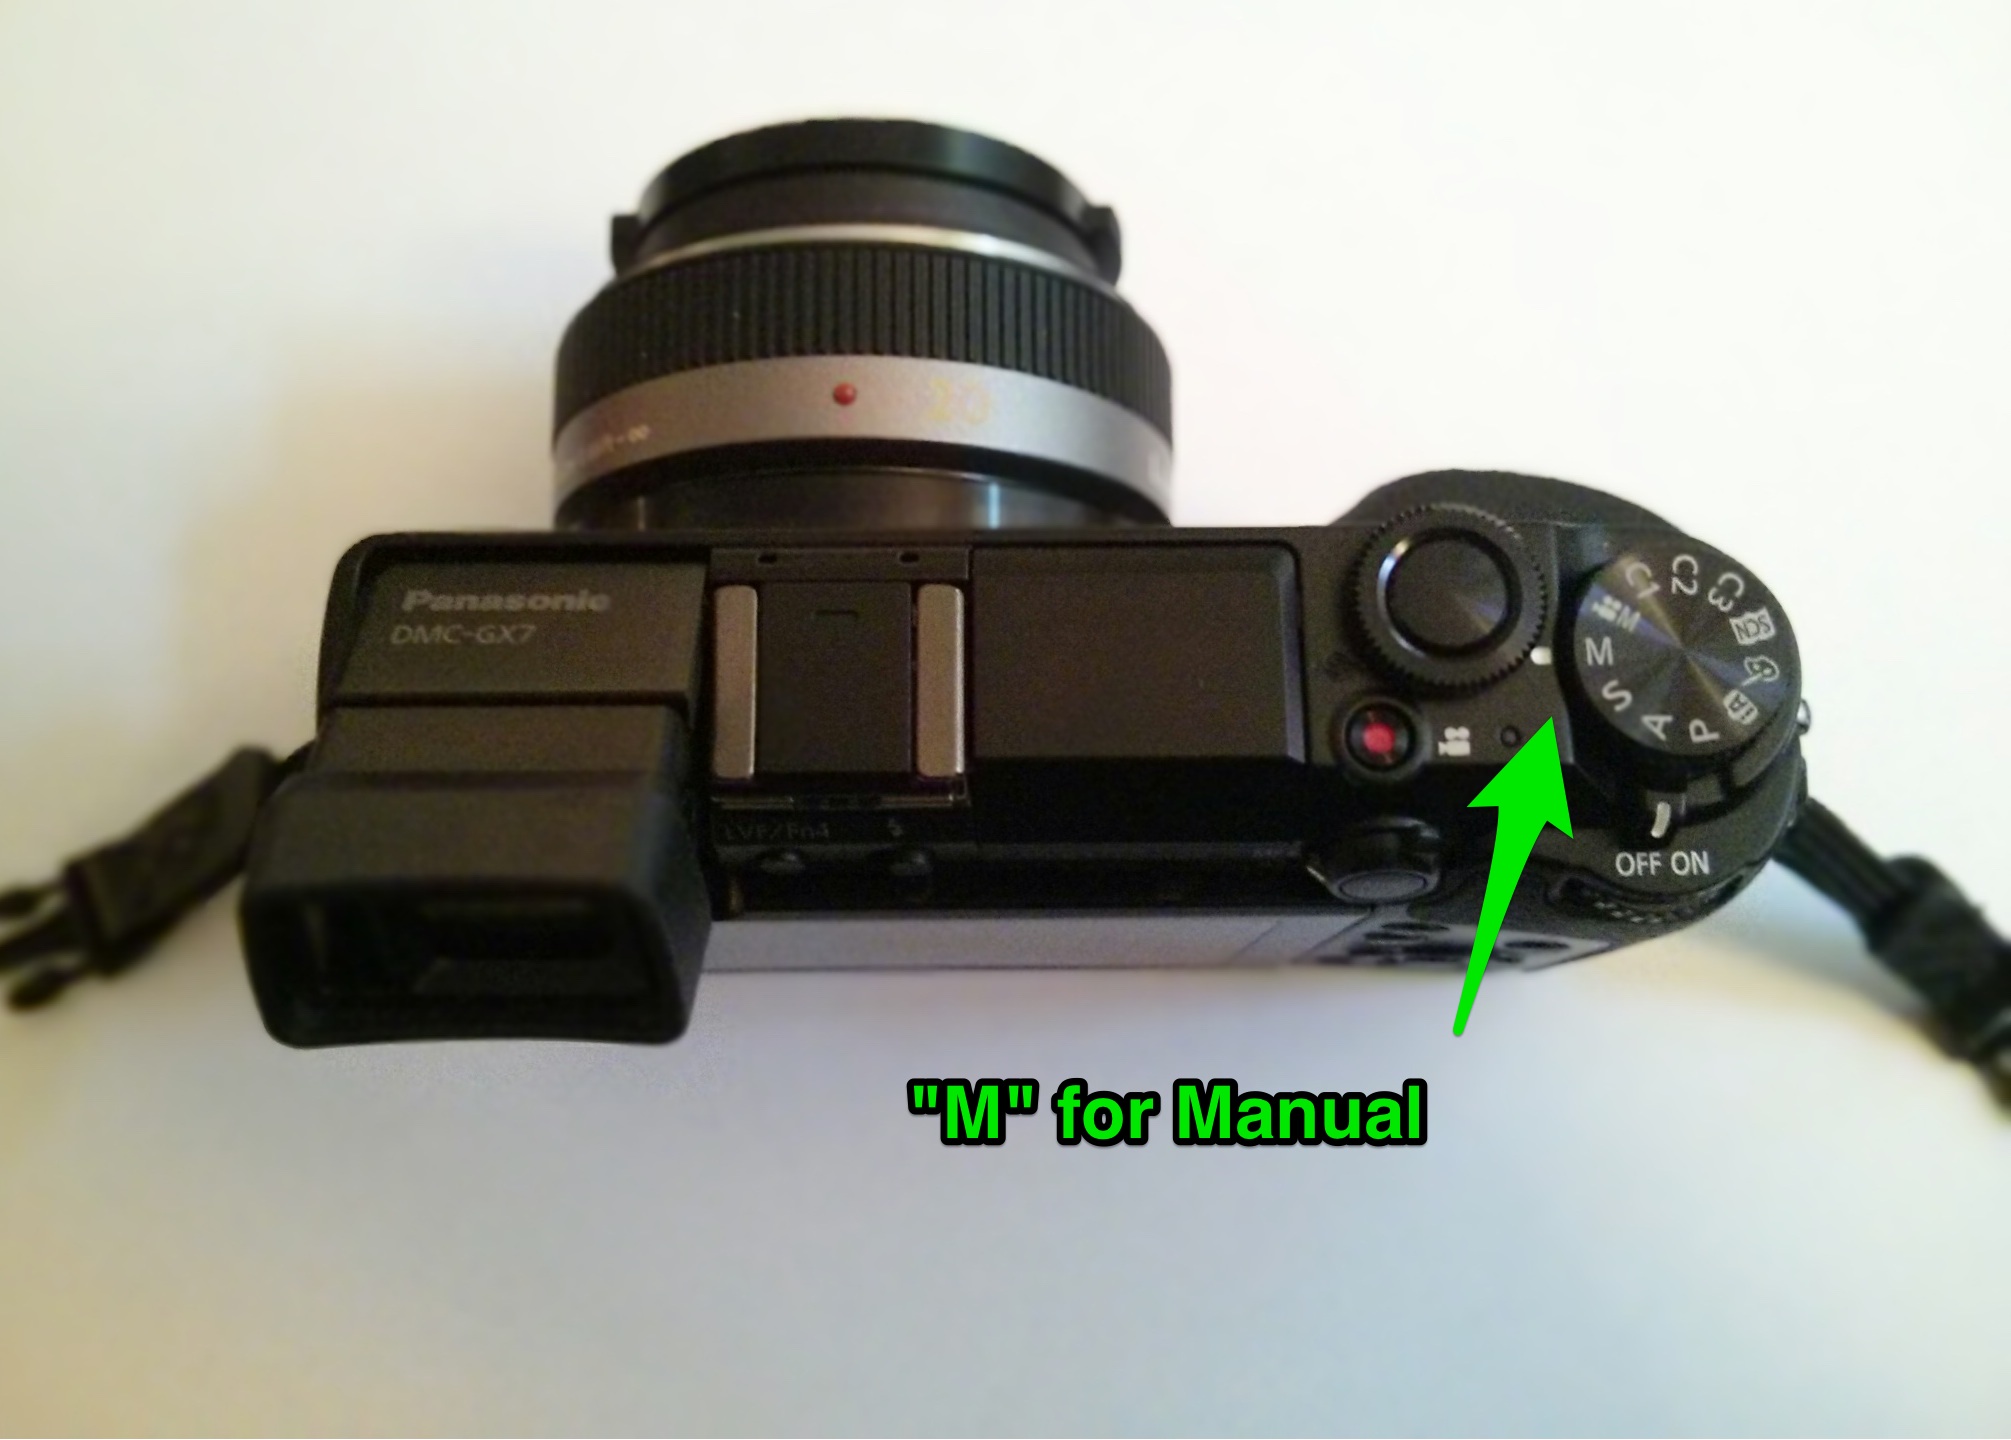
This might be the trickiest part, but, that said, it’s not too hard at all.
We’re going to set up a “long exposure” shot. This means that we’re going to keep the shutter open for seconds instead of fractions of a second. Like most photography topics, we can get into a lot of detail, and if you’re interested in more, I recommend researching this further via popular search engines – here’s a page with some cool examples and tips to get started
Also, and important: automatic exposure isn’t going to work – keep in mind we’re going to be taking a photo of something that isn’t there yet! Unfortunately that also rules out most cell-phone cameras and the most basic point-and-shoots.
OK got it? Long story short, let’s try these settings:
- Manual exposure (M)
- Low ISO (let’s start at 400)
- Medium Aperture (F 5.6)
- Looooong Exposure (15 Seconds!)
- White balance set for incandescent.
If those are too bright (or not bright enough) then play around with them – but chances are that they’ll work Ok.
#Step 5: Go somewhere dark and run your BlinkyTape in front of the camera! OK folks. The sun has set, you’ve got everything you need, and it’s go time: your camera is pre-set and on it’s tripod. The BlinkyTape is pre-set with the image and ready to be switched on.
Go to your nice, dark location and set up your camera. Position your assistant properly and focus (or figure out where you’re going to run to after you hit the timer!) Hold the BlinkyTape vertically and make sure the LEDs face the camera directly – the top is the end with the USB connector.
When everything is in place, just hit the shutter button and have your assistant walk the BlinkyTape strip in front of the camera. No need to run – a quick walk is perfect.
If you’re shooting digital, you’ll see your handiwork right away (exciting!) If things are too bright, decrease the ISO or select a smaller F-stop. Most likely it’ll just take you a try or two to get it right (the image at the top of this page was try #2), and then you’ll know how easy it is to make these near-magical light paintings whenever you want!
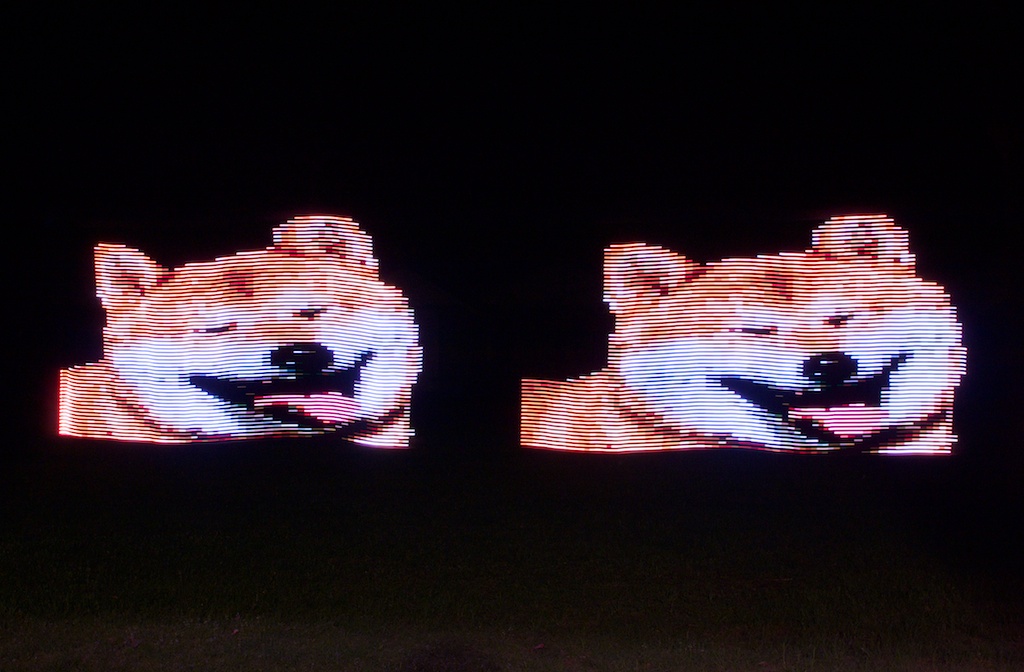
This is only a primer to get you up and running with the basics – a lot more is possible, and don’t forget to share your creations in the forums!