BlinkyTile addressing
Each BlinkyTile has a number assigned to it which is important for programming patterns. Lower-numbered kits have the number screened on each tile – and for some larger kits you’ll get several with the same numbers.
The good news is that you can always reset the numbers to suit your own needs!
Here’s how:
First: the software
We’ll need a couple of things to flash the tile numbers – Python, PySerial, and the content from the BlinkyTile Github repository.
Unzip the BlinkyTile directory into somewhere convenient.
Second: connect the programming line
Next, you’ll need a few things: grab your BlinkyTile sculpture. You’ll need to have your tiles in place and connected to the control board to program them.
Next, you’ll need the small wire connector that came with your kit.
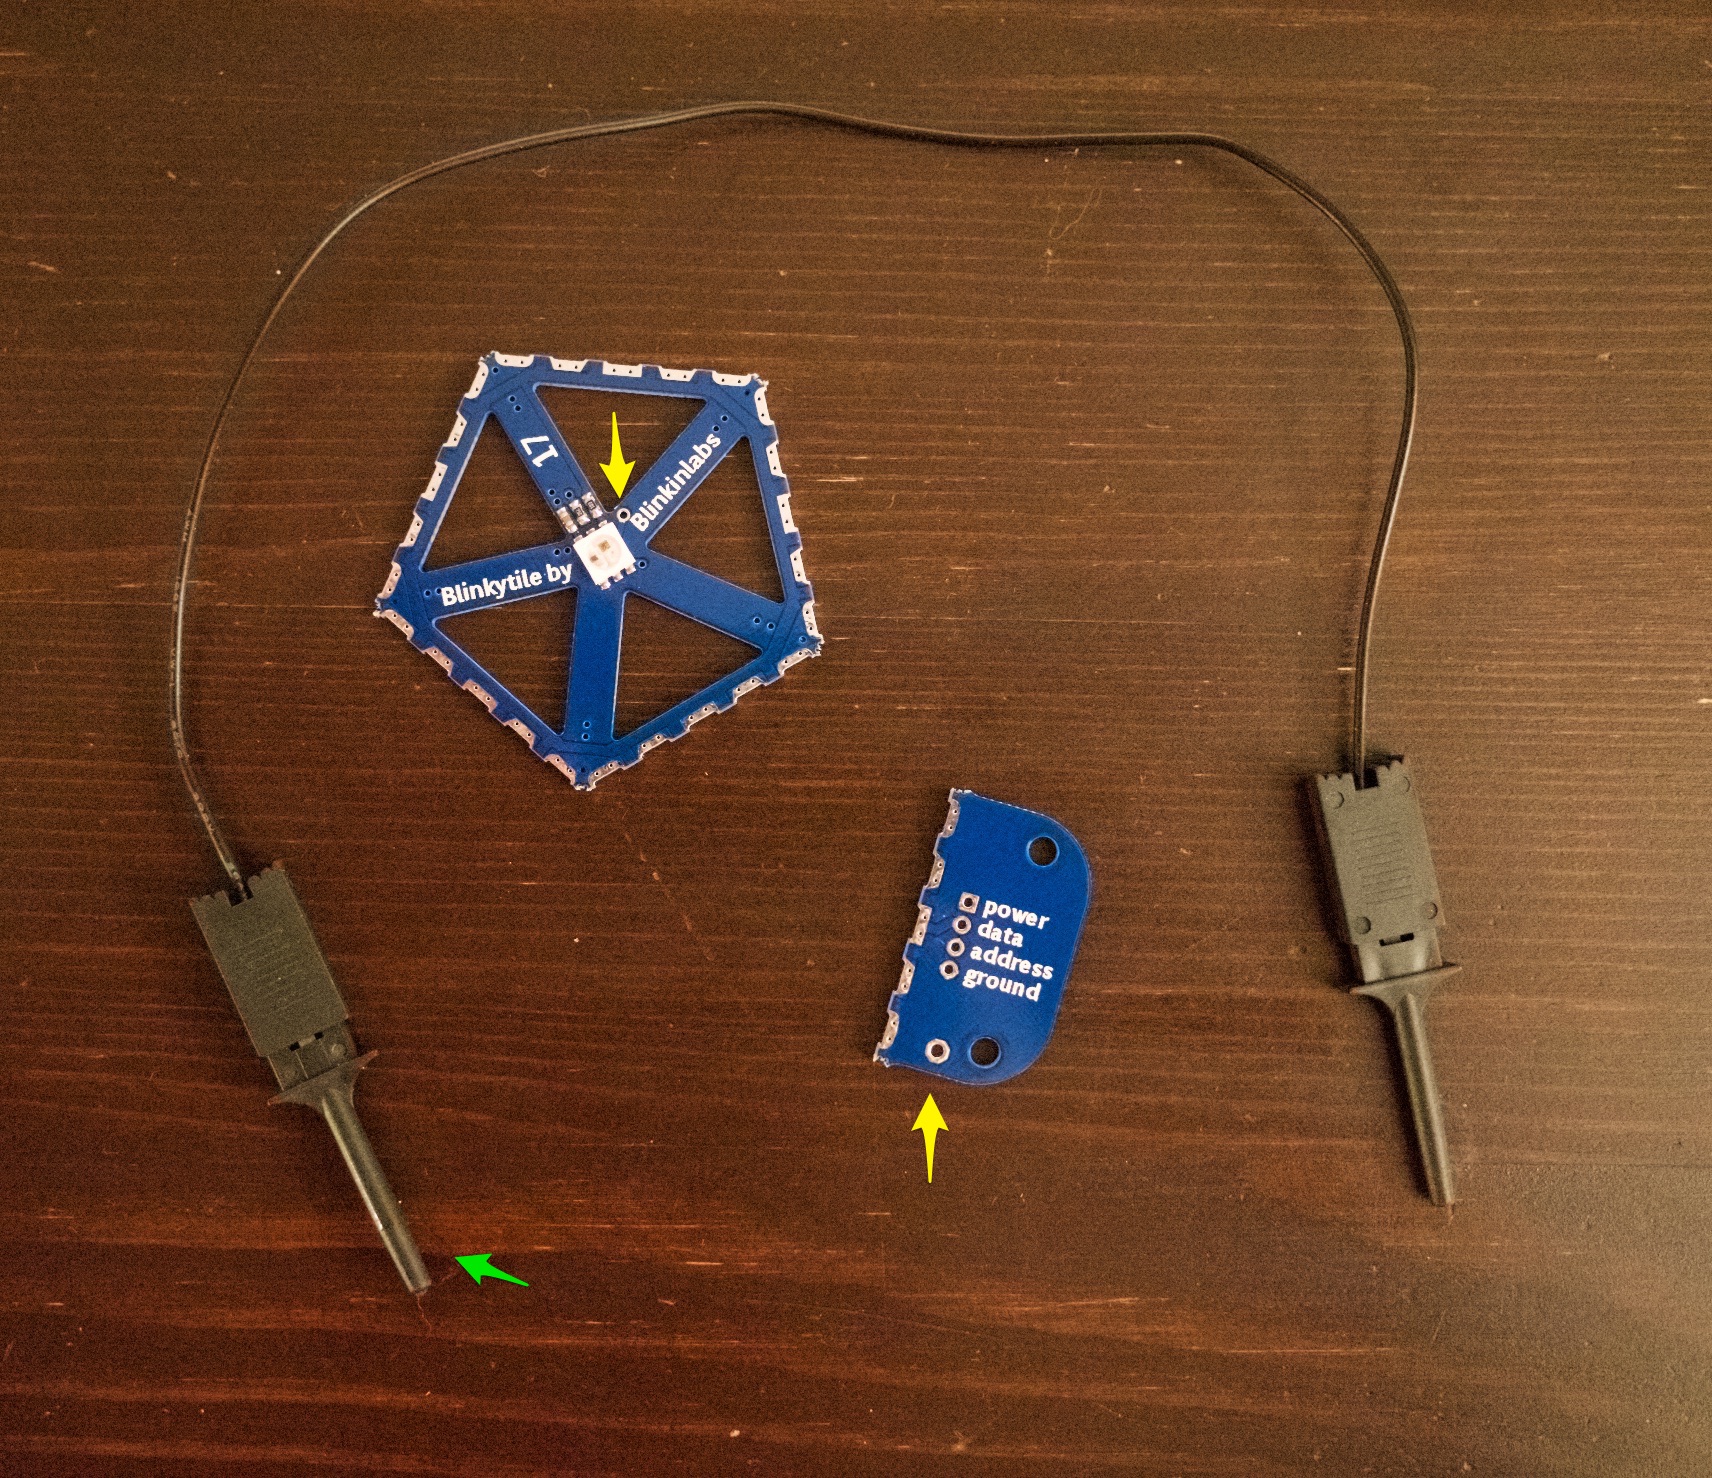
Take a look at the adapter board (the one you used to connect the LightBuddy controller to your sculpture) and a BlinkyTile – you’ll see a small hole on each of them. That’s the line for programming – use wire connector to make a connection between the hole on the adapter board and the one on the tile you want to program.
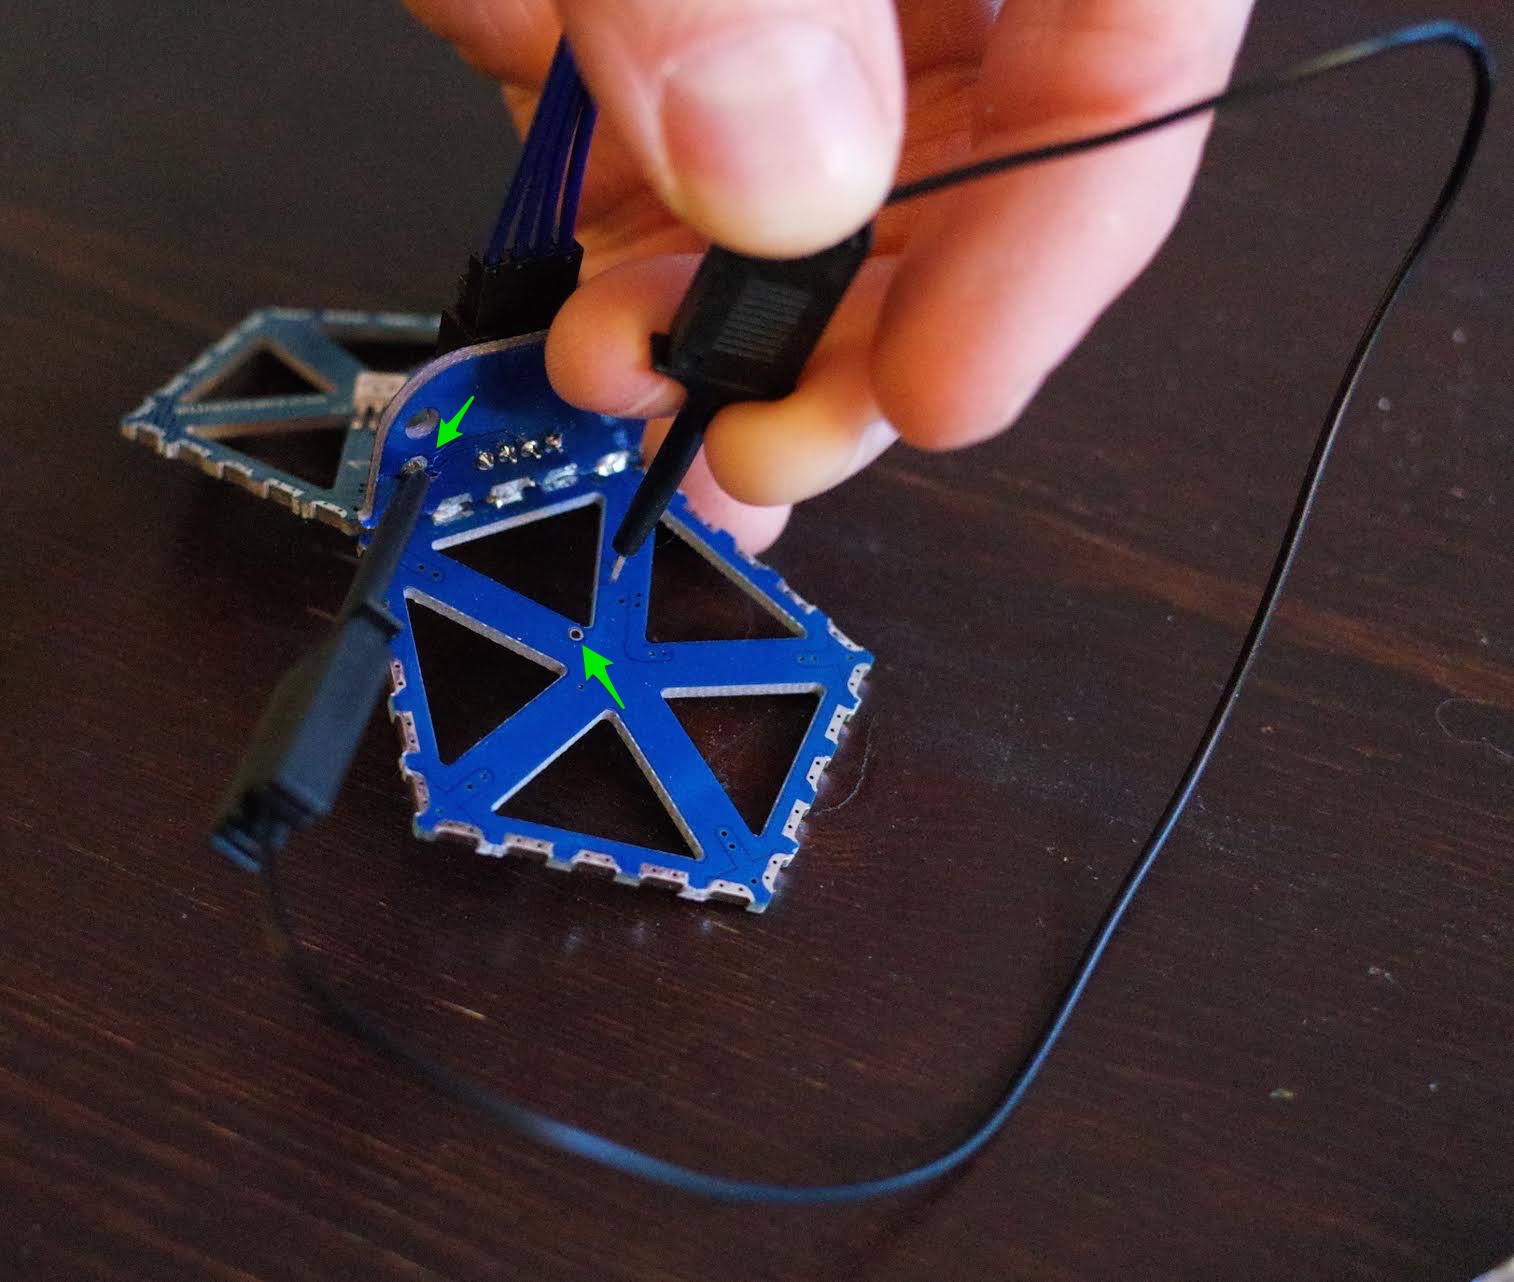
Here’s how it might look connected up:
Third: run the programming script
Now that you have things connected up, go to the python_example folder inside that BlinkyTile folder that we unzipped earlier.
In that folder, just type:
python addressprogrammer.py
Then, just follow the prompts to give your tile a new number. The tile will flash to confirm, and then you’re done! Here’s a quick video to show the process:
If you’d like to verify the addresses that you programmed, check out addressidentifier.py as well!